Understand what to record when a component is removed from an unfamiliar assembly.
Sağlam bir değiştirme süreci, zincirin gerçekleştirdiği işi ve kurulumda mevcut olan kanıtları belirleyerek başlar. Aşağıdaki adımlar bir karar iş akışı olarak sunulmuştur. Ölçülmemiş herhangi iki bileşenin birbirinin yerine geçebileceği varsayımı yapılmamıştır.
Separate The Component Types
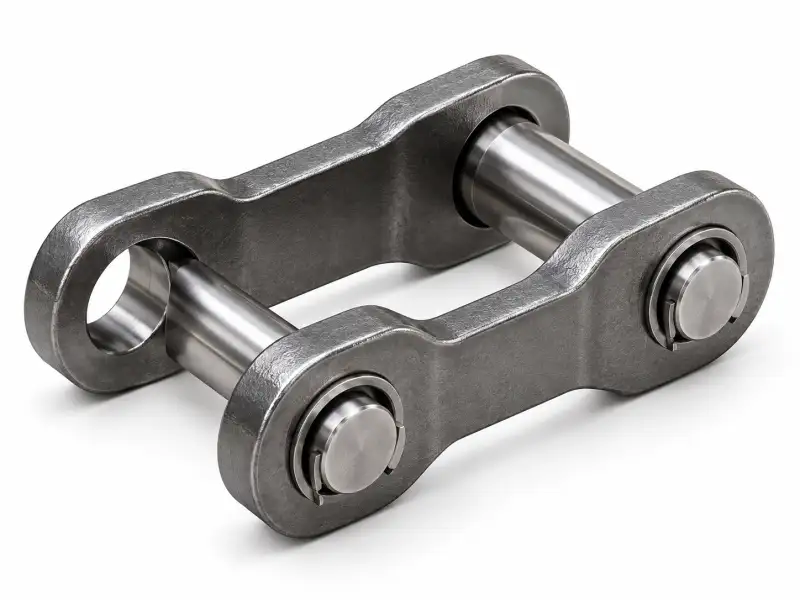
A link forms the repeated joint; a connecting element joins two structures; an attachment bracket supports something external; a plate may carry ground reaction or material. Determine the job before selecting a name.
Use An Orientation Sketch
Draw the machine direction, inner and outer chain faces and major bolt holes. This prevents a visually symmetric photograph from concealing a handed or offset component.
Bu adımda, önceki durumu ve kararı vermek için kullanılan kesin ölçümü veya gözlemi belgeleyin. Parça zaten çıkarılmışsa, bitişik bileşenlerin fotoğraflarını çekerek nereye takıldığını gösterin. Daha sonra kontrol edilebilmesi için fotoğraf tanımlayıcısını ölçülen değerin yanına koyun.
Collect Key Dimensions
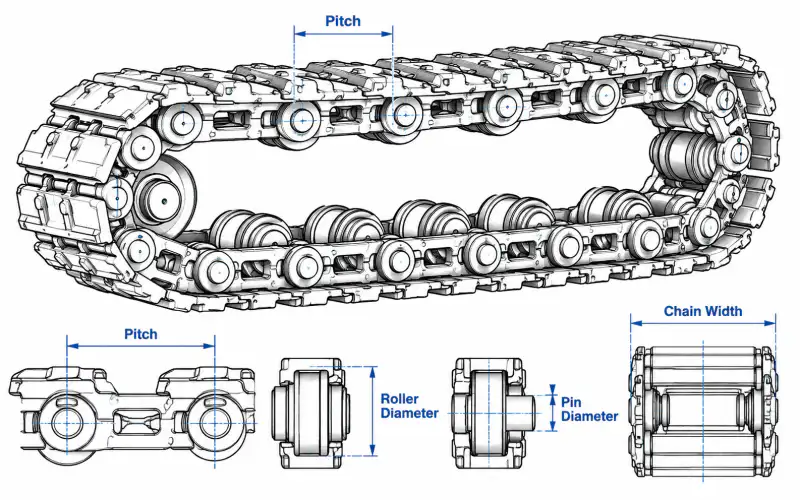
Mark pin centres, bore diameters, width between plates, component thickness, overall height and any special offsets. Include a scale and specify metric or imperial units.
A supplier reviewing collect key dimensions must know whether the figure is nominal drawing data, field measurement, or an estimate from a worn component. That distinction changes what can be quoted without a sample and what needs an additional dimensional inspection.
Check Adjacent Parts
Photograph the pieces that mate with the unknown component. A connection that looks standard may rely on a special spacer, end retainer or nonstandard boss.
Bu adımda, önceki durumu ve kararı vermek için kullanılan kesin ölçümü veya gözlemi belgeleyin. Parça zaten çıkarılmışsa, bitişik bileşenlerin fotoğraflarını çekerek nereye takıldığını gösterin. Daha sonra kontrol edilebilmesi için fotoğraf tanımlayıcısını ölçülen değerin yanına koyun.
Prevent Misclassification
Do not copy a type name from a catalogue image when the installed part serves a different machine function. Treat uncertainty as a technical question to resolve before procurement.
Sorgulama Veri Kontrol Listesi
| Alıcı girdisi | Onaylama nedeni |
|---|---|
| Makine bağlamı | Zincirin gerçek işlevi, kurulum konumu, biliniyorsa ekipman modeli. |
| Zincir boyutları | Birden fazla bağlantı noktasındaki adım aralığı, genişlik ve bağlantı noktası referans boyutları |
| Montaj arayüzü | Bağlantı noktaları, delik deseni ve dişli çark ilişkisi |
| Hizmet bağlamı | Çalışma ortamı, aşınmaya maruz kalma ve yıpranma belirtileri |
| Dosyalar | Ölçülü çizim, montaj fotoğrafları, parça referansı, miktar |
Doğrulama Gerektiren Kararlar
Üretim boyutları, malzeme kalitesi, ısıl işlem, izin verilen çalışma yükü ve varsa yedek parça referansı, sipariş edilen gerçek konfigürasyon için teyit edilmelidir. Genel zincir geometrisi ön tanımlamaya yardımcı olabilir ancak tek başına garantili bir yedek parça sağlayamaz.
Nominal zincir adımı bilinse bile, bağlantı tertibatını inceleyin. Bir bağlantıyı onaran ancak ciddi şekilde aşınmış dişli çark dişlerini veya deforme olmuş braketleri değiştirmeden bırakan bir onarım, altta yatan arızayı gidermeyebilir. Acil bakım çalışmalarını, komple sistem değiştirme kararından ayırt edin.
Teknik İnceleme İş Akışı
- Makinenin işlevini ve hangi bileşenden bahsedildiğini belirleyin.
- Ölçülen geometriyi fotoğraflar ve birimlerle kaydedin.
- Dişli zincirini, dişli çarkı ve bağlantı arayüzünü kontrol edin.
- Değiştirme işleminin kapsamını ve miktarını tam olarak belirleyin.
- Konfigürasyon incelemesi için çizimi ve fotoğrafları gönderin.
Sıkça Sorulan Sorular
Orijinal parça numarası eksikse ne olacak?
Kurulum aşamasındaki makine görüntülerini, ölçülmüş bir zincir örneğini, bağlantı parçalarının fotoğraflarını ve görev tanımını kullanın.
Fiyatın uygun olması sipariş vermek için yeterli mi?
Hayır. Aynı nominal hatvede bile mafsal şekli, genişliği, makara geometrisi, montaj ofseti ve dişli çark bağlantısı farklılık gösterebilir.
Aşınmış bir parçanın ölçüleri kullanılabilir mi?
Evet, geçici bir başlangıç noktası olarak kabul edilebilir, ancak önemli aşınmalar belgelenmeli ve mümkünse aşınmamış bir referansla karşılaştırılmalıdır.
Teknik bir soruşturma nasıl verimli bir şekilde incelenebilir?
Lütfen gerçek uygulamayı, ölçekli fotoğrafları, okunabilir çizimi, bağlantı sayısını, arayüz detaylarını ve miktarını sağlayın.
Start With Mechanical Function
A chain component should be named according to the force or motion it handles, not only the way its silhouette looks. Determine whether it forms a repeating link, carries an attachment, joins two chain sections or interacts directly with a sprocket. Photographs may show substantial metal shapes but not the side that actually transmits force. A simple sketch with arrows for chain travel and load direction helps reveal the role. This is particularly important where catalogue pictures include both crawler and mining conveyor parts that share visually similar features.
Create An Orientation Record
Before removing the part, mark the outward face, machine side, direction of travel and connection to nearby plates. Photograph the fasteners and retainers before disassembly, keeping each image in a numbered sequence. With an unfamiliar assembly, pieces that appear mirror-symmetric may actually have offset bosses or hand-specific mounting faces. A labelled orientation record reduces the chance of ordering a part that physically matches one face but cannot be installed on the required side. Include a wide view of the mechanism to show what the detail belongs to.
Measure The Joint Profile
Record the distance between pin centers, inside and outside widths, plate thickness, pin-hole diameters and any shoulder lengths. On components with a mounted plate, add hole centers and vertical offsets from the chain joint axis. Avoid measuring only the longest visible dimension. A small change in an internal clearance can prevent articulation even where outside dimensions are similar. Keep worn values separate from drawing values and identify which surfaces show deformation. If the original nominal shape cannot be reconstructed safely, request an engineering review with the worn sample and related assembly drawings.
Inspect Connected Elements
No link works in isolation. A joint may include a pin, a bush, a roller, a spacer and retention hardware; a mounted attachment may also connect to a larger bar or plate. Assemble a simple parts map showing which items move together and which surfaces articulate. This helps distinguish a connecting link from a load-carrying bracket and reveals whether replacement parts should be ordered as a kit. When a chain guide or sprocket touches a particular surface, include that detail in the sketch because it can identify an otherwise ambiguous component.
Avoid False Interchange Claims
Matching an online photograph is a useful first step but is not a substitute for dimensions and mechanical compatibility. A replacement may share an outside profile yet differ at the pin axis, internal width or support contact point. Do not use brand names or nominal family labels to claim direct substitution without a checked drawing. In an enquiry, identify any missing values and the evidence available for verifying them. If one source image appears to represent a material conveyor part rather than a travelling track part, keep that uncertainty visible.
Organize The Final Package
Arrange the enquiry as machine overview, installed assembly, removed part views, dimensions, component count and required quantity. Use descriptive filenames and keep a concise list of open questions. If a workshop can supply a measured sketch, attach it alongside the unedited photographs. This provides enough context for a technical dialogue without implying that every part has already been identified. The resulting record can later become the basis for a model-specific product page once an approved configuration and real dimensions are confirmed.
Sonraki Adım
Ölçüm kılavuzlarını ve ürün ailesi sayfalarını birlikte kullanın. Açık ve net bir sorgulama kaydı, teknik ekibin, değiştirme kararı maliyetli hale gelmeden önce belirsizliği belirlemesine yardımcı olur.